Jinnoro
Guides · Work · 5 min read
Track a job search from first application to offer
Use sections as stages, from To apply to Offers, and labels to remember interview prep and follow-ups.
A job search is a pipeline: companies move from “interesting” to “applied” to “interviewing”, and some fall away. Keeping that pipeline in one place saves you from the worst moment, which is a recruiter calling and you not remembering who they are.
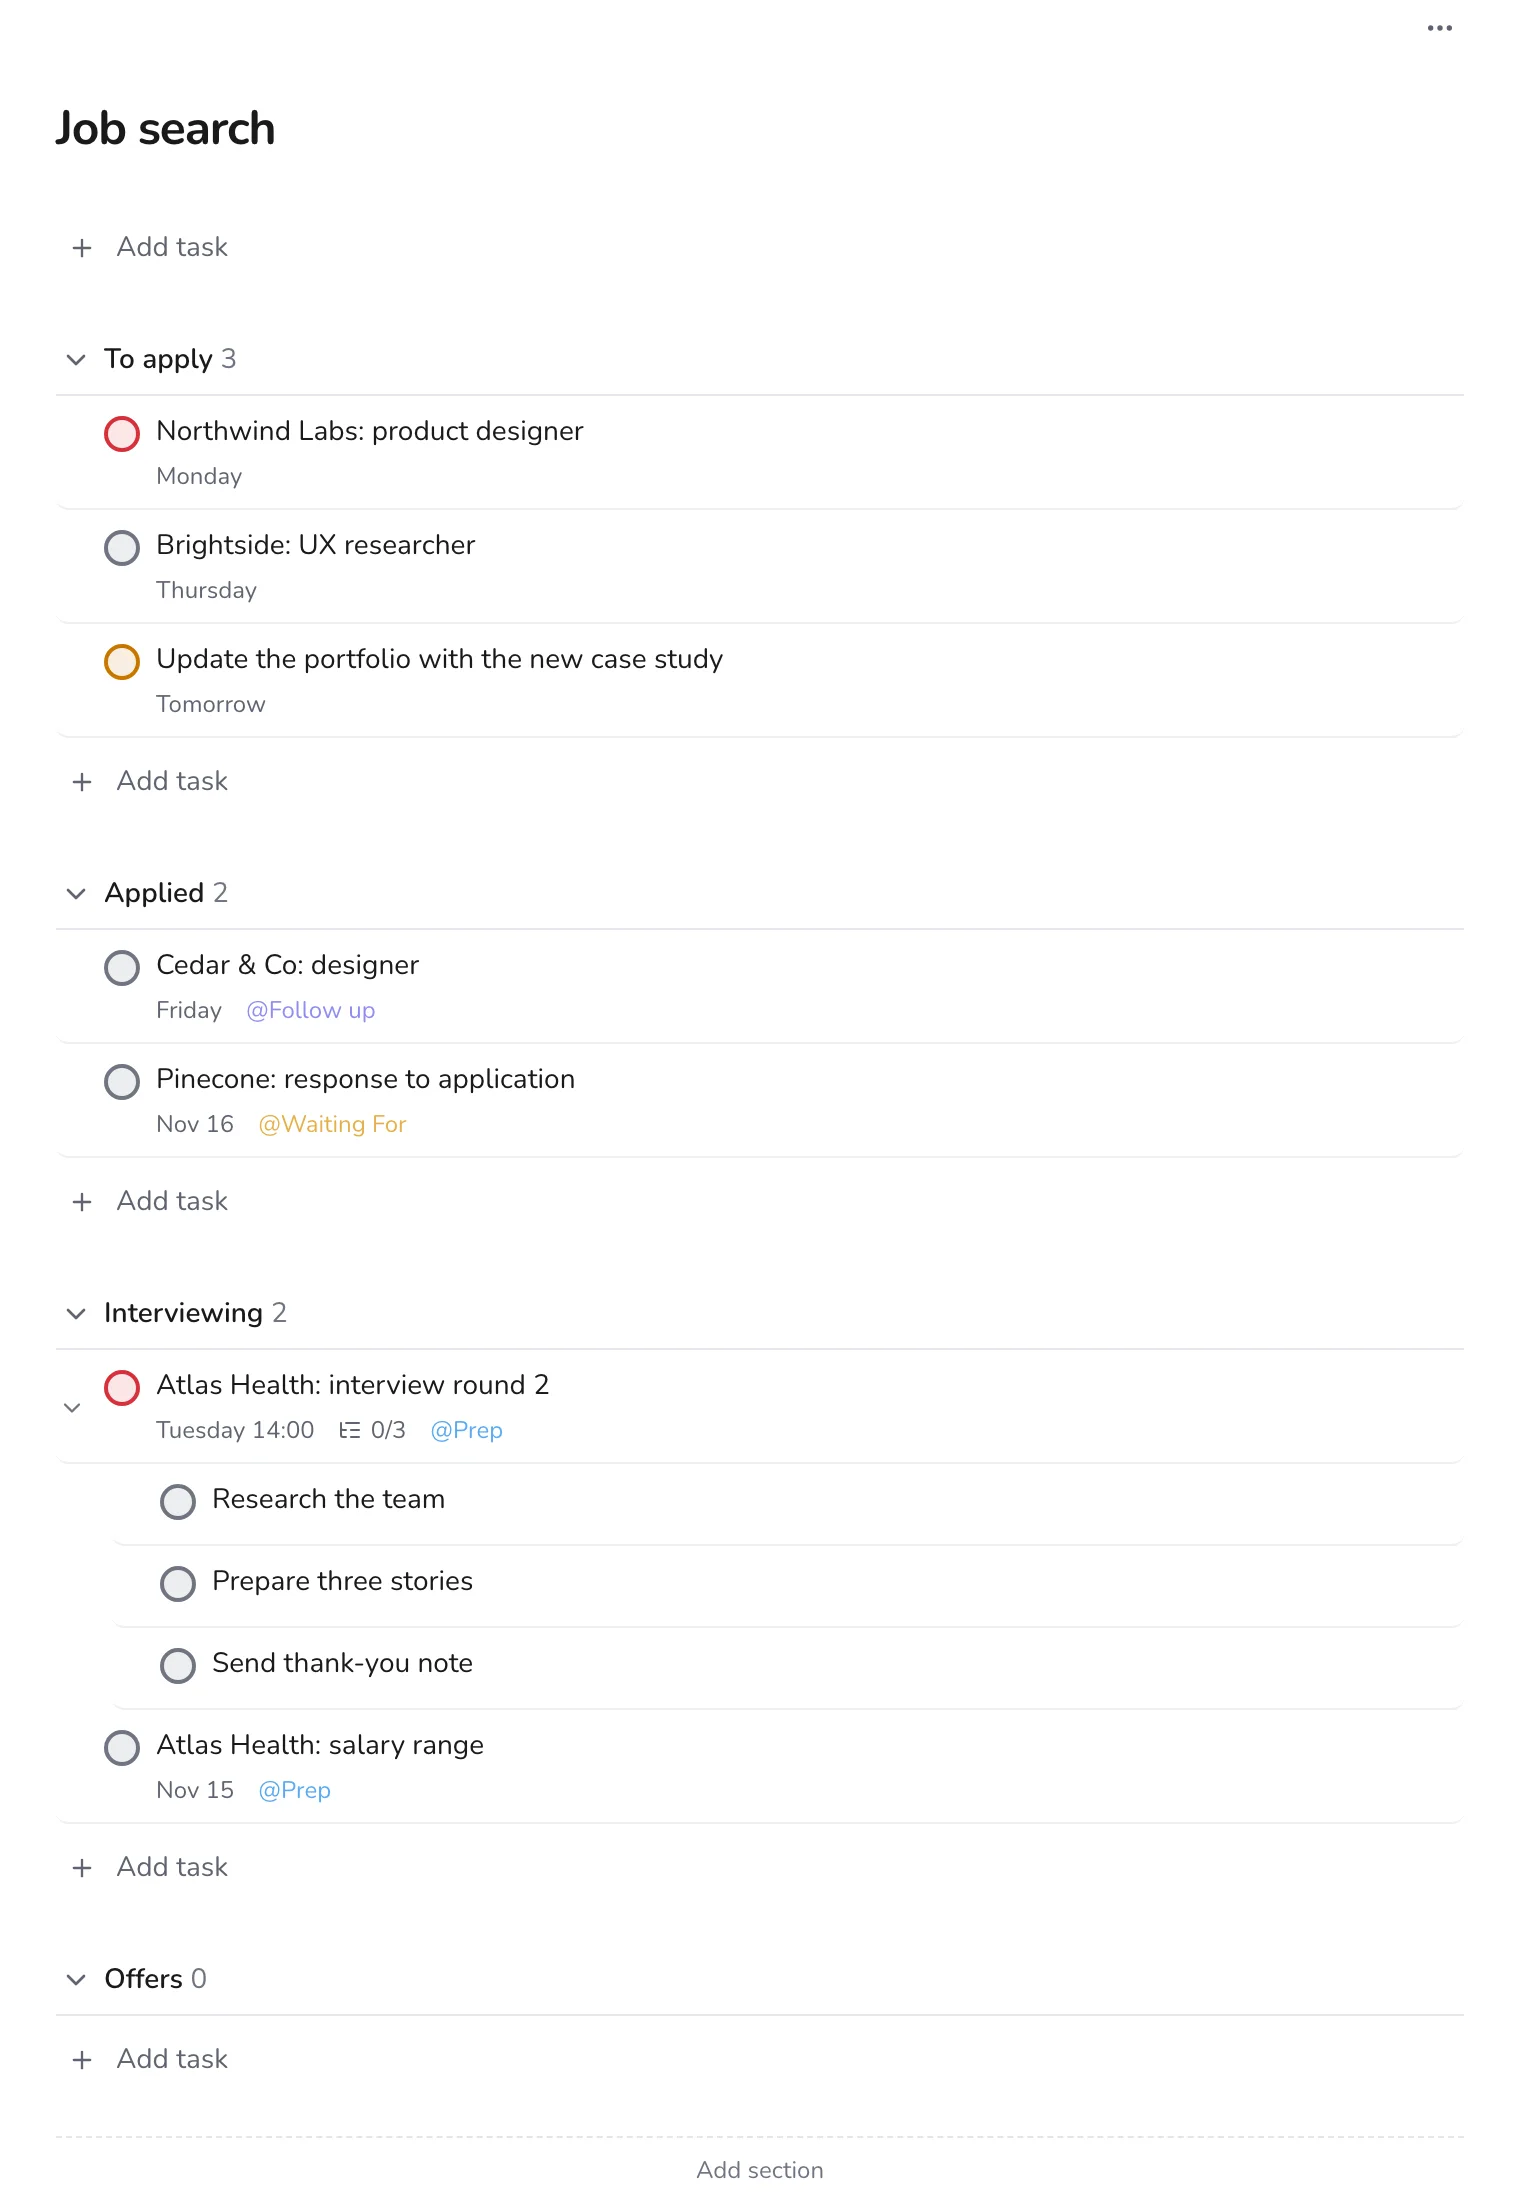
This guide uses one project with four sections as stages, and three labels: Waiting For, Prep and Follow up.
Step 1
Create the project with a section for each stage
Make a project called Job search. Add four sections: To apply, Applied, Interviewing and Offers. Add each company as a task, titled with the company and the role.
Step 2
Move companies through the stages
When you apply, drag the task from To apply to Applied. When you get an interview, drag it again. The page always shows where you stand, and the counts next to each section are your numbers.
Step 3
Prepare for interviews with subtasks
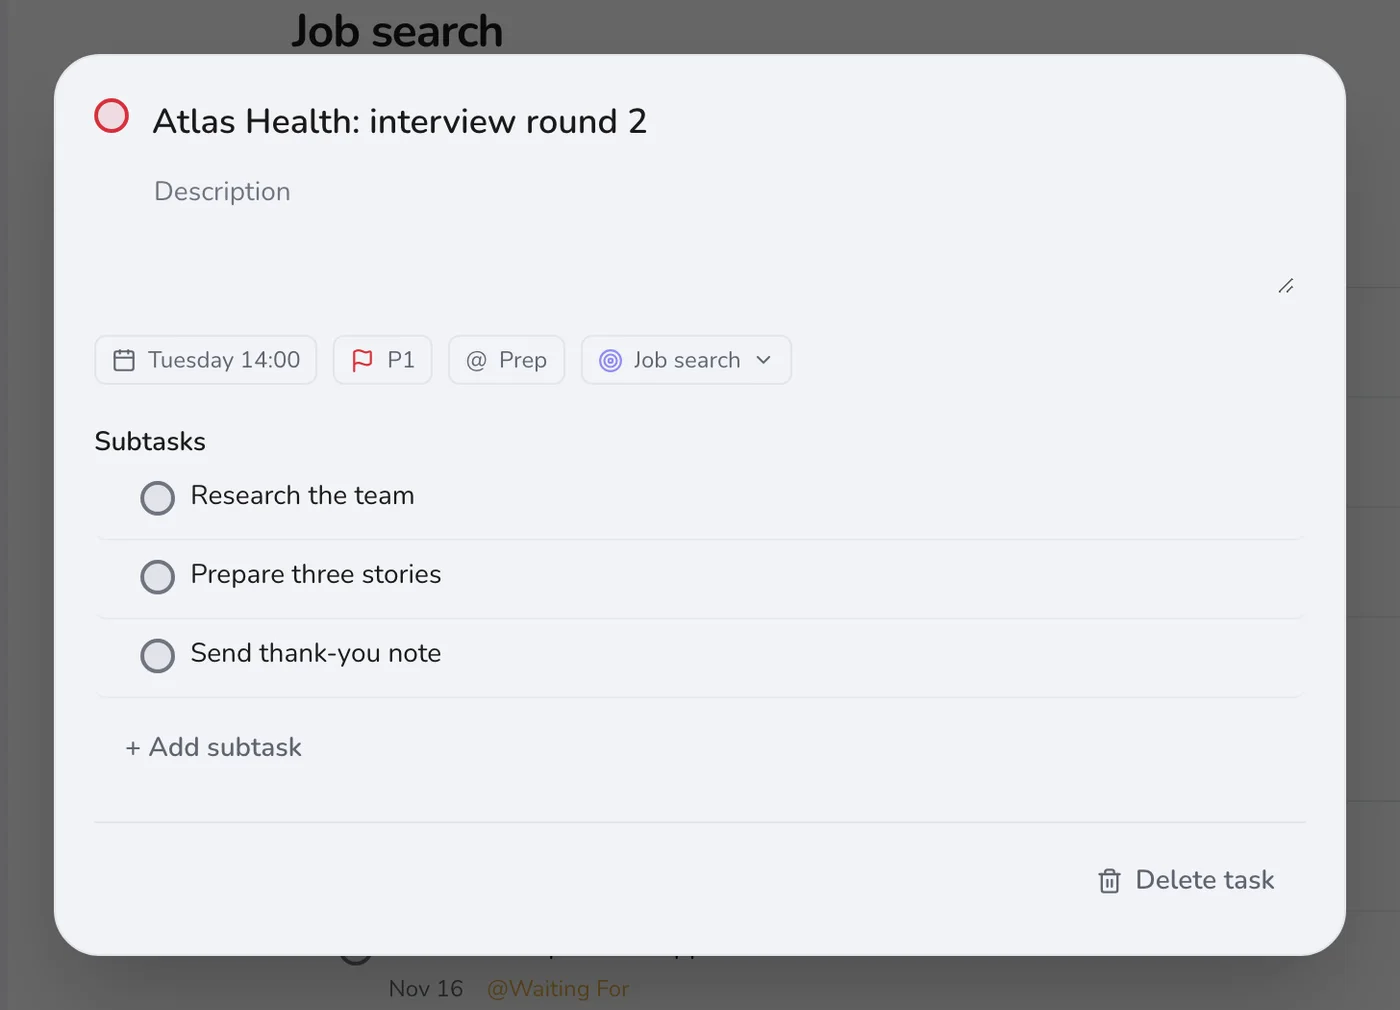
Open an interview task and add subtasks: research the team, prepare three stories, and send a thank-you note afterwards. Put a date and time on the task itself.
Step 4
Wait on purpose
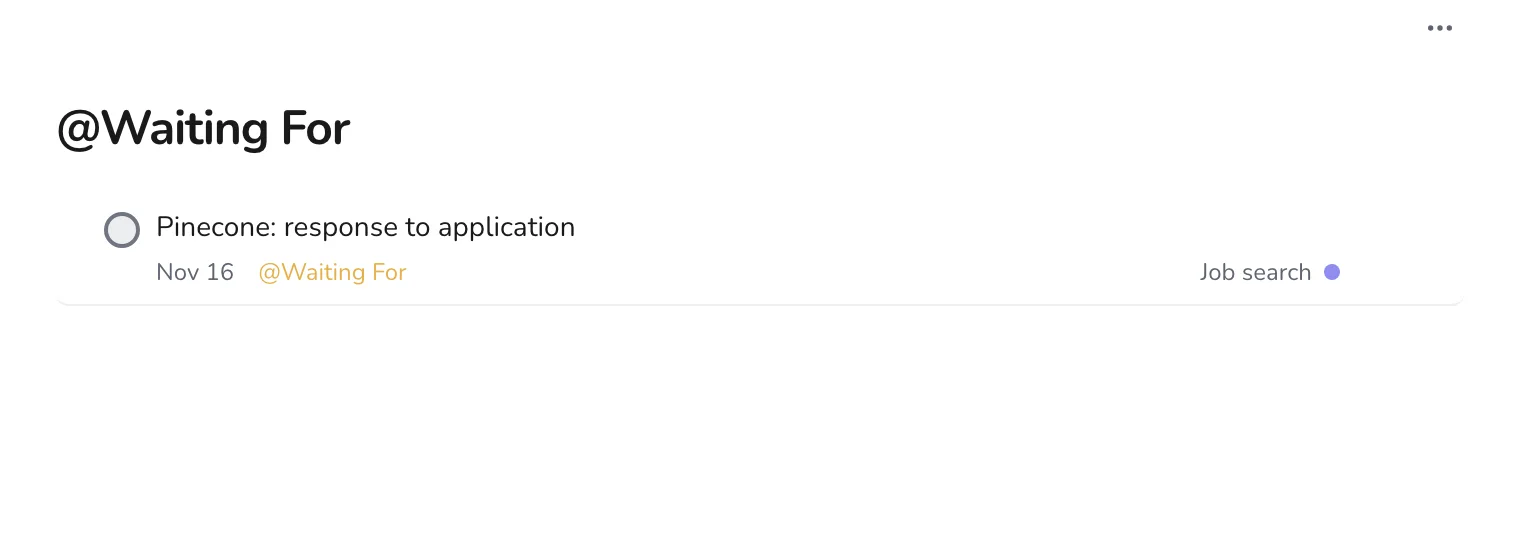
After applying, the next step belongs to the company. Add the Waiting For label to the task and set a date, about a week away. That is the day you follow up.
Step 5
Add new leads in seconds
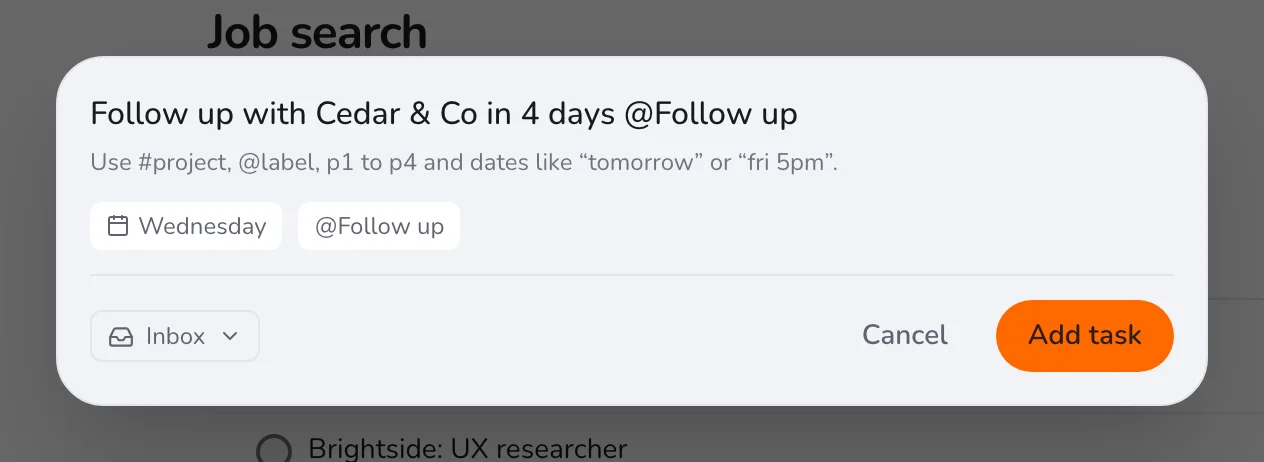
A friend mentions a job, or a recruiter writes. Press Q, name the company, add a date, and the label.
Keep the project after you find a job. It is a record of what worked. For a similar approach to applications, see tracking college applications.