Jinnoro
Guides · Students · 5 min read
Manage lab work and lab reports
Plan each lab in three stages, before, during and after, so the report is never a last-minute scramble.
A lab has a clear shape: you prepare, you do the experiment, and you write it up. Most of the stress comes from the write-up, which waits until the night before it is due.
This guide uses one project with three sections, and two labels, Report and Data, to keep the report work visible from the start.
Step 1
Create a project and three sections
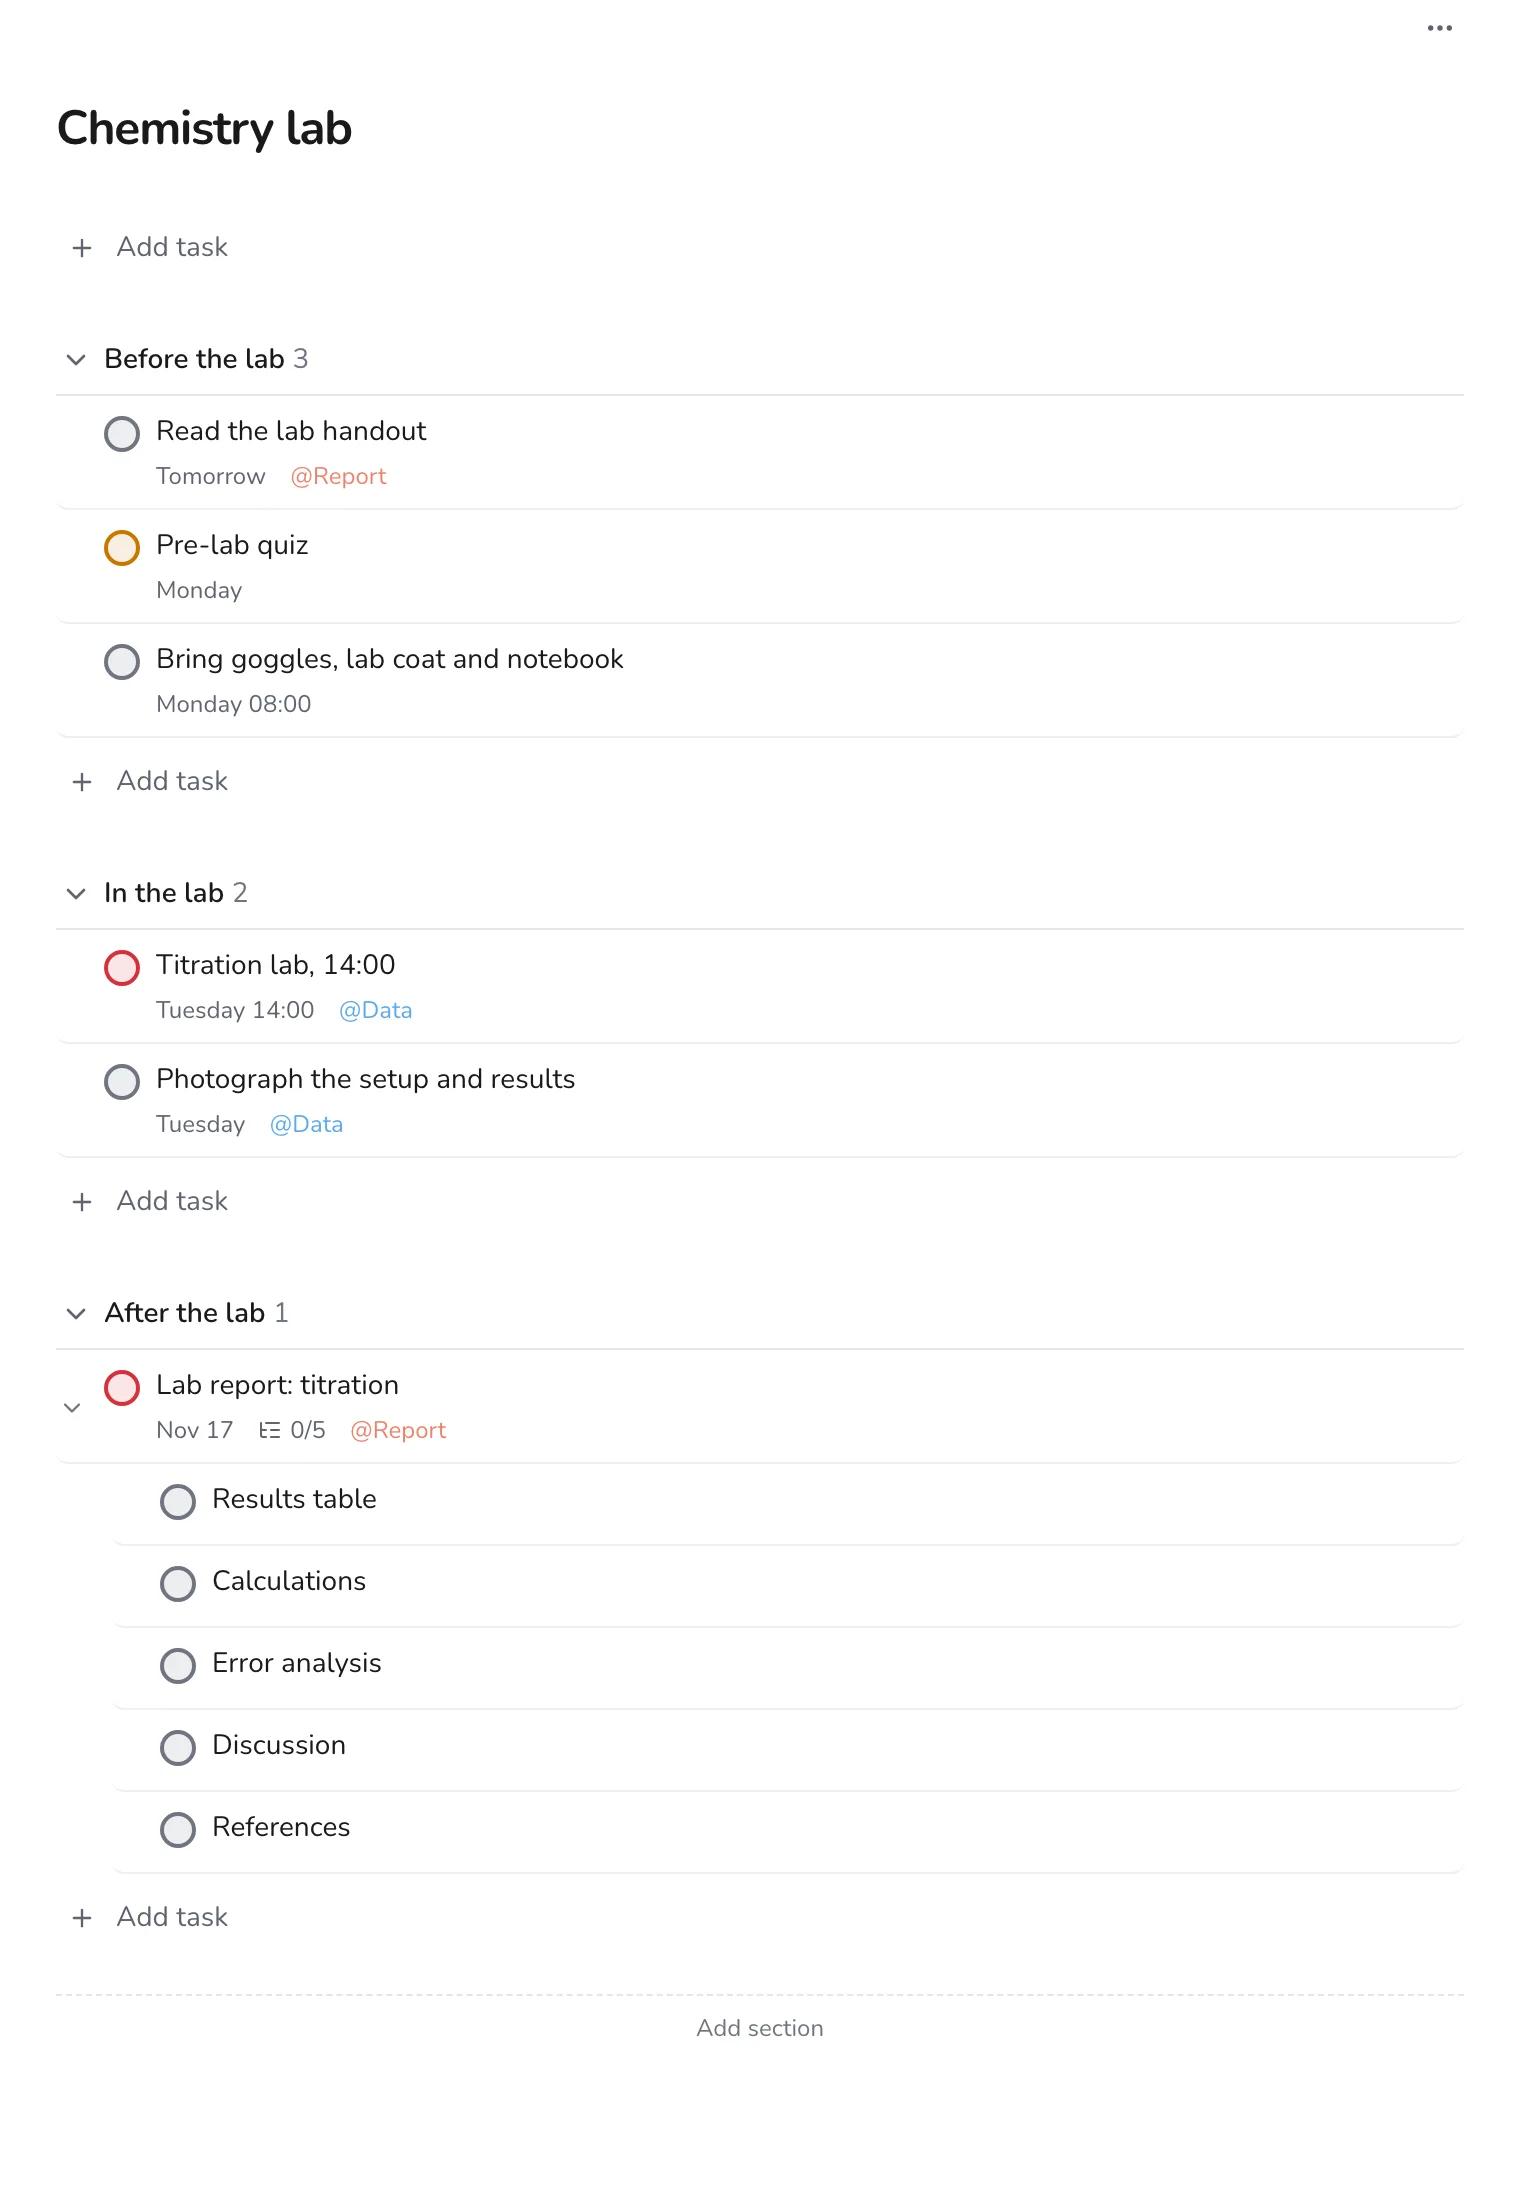
Make a project for the lab course, with sections Before the lab, In the lab and After the lab. Each time there is a new experiment, add its tasks to these sections.
Step 2
Prepare so you can use the lab time
Before the lab, read the handout, take the pre-lab quiz, and pack. Put the time of the lab on its own task, with p1, so it appears prominently in Today and Upcoming.
Step 3
Capture data and photos in the lab
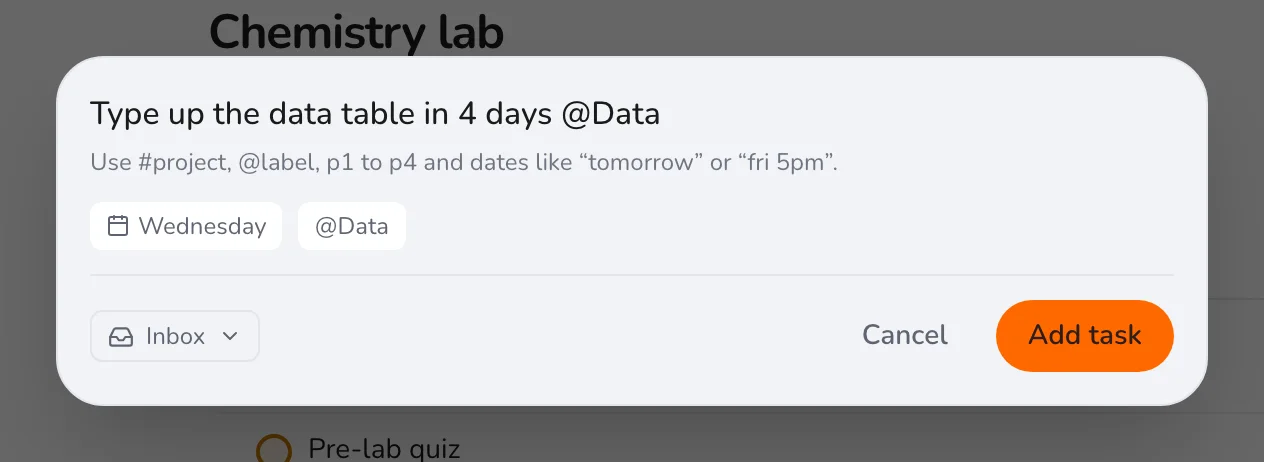
Use the Data label for anything that produces results: the experiment itself, photos of the setup, a table of numbers. Do these first when you are back at your desk, before you forget what the notes mean.
Step 4
Break the report into its sections
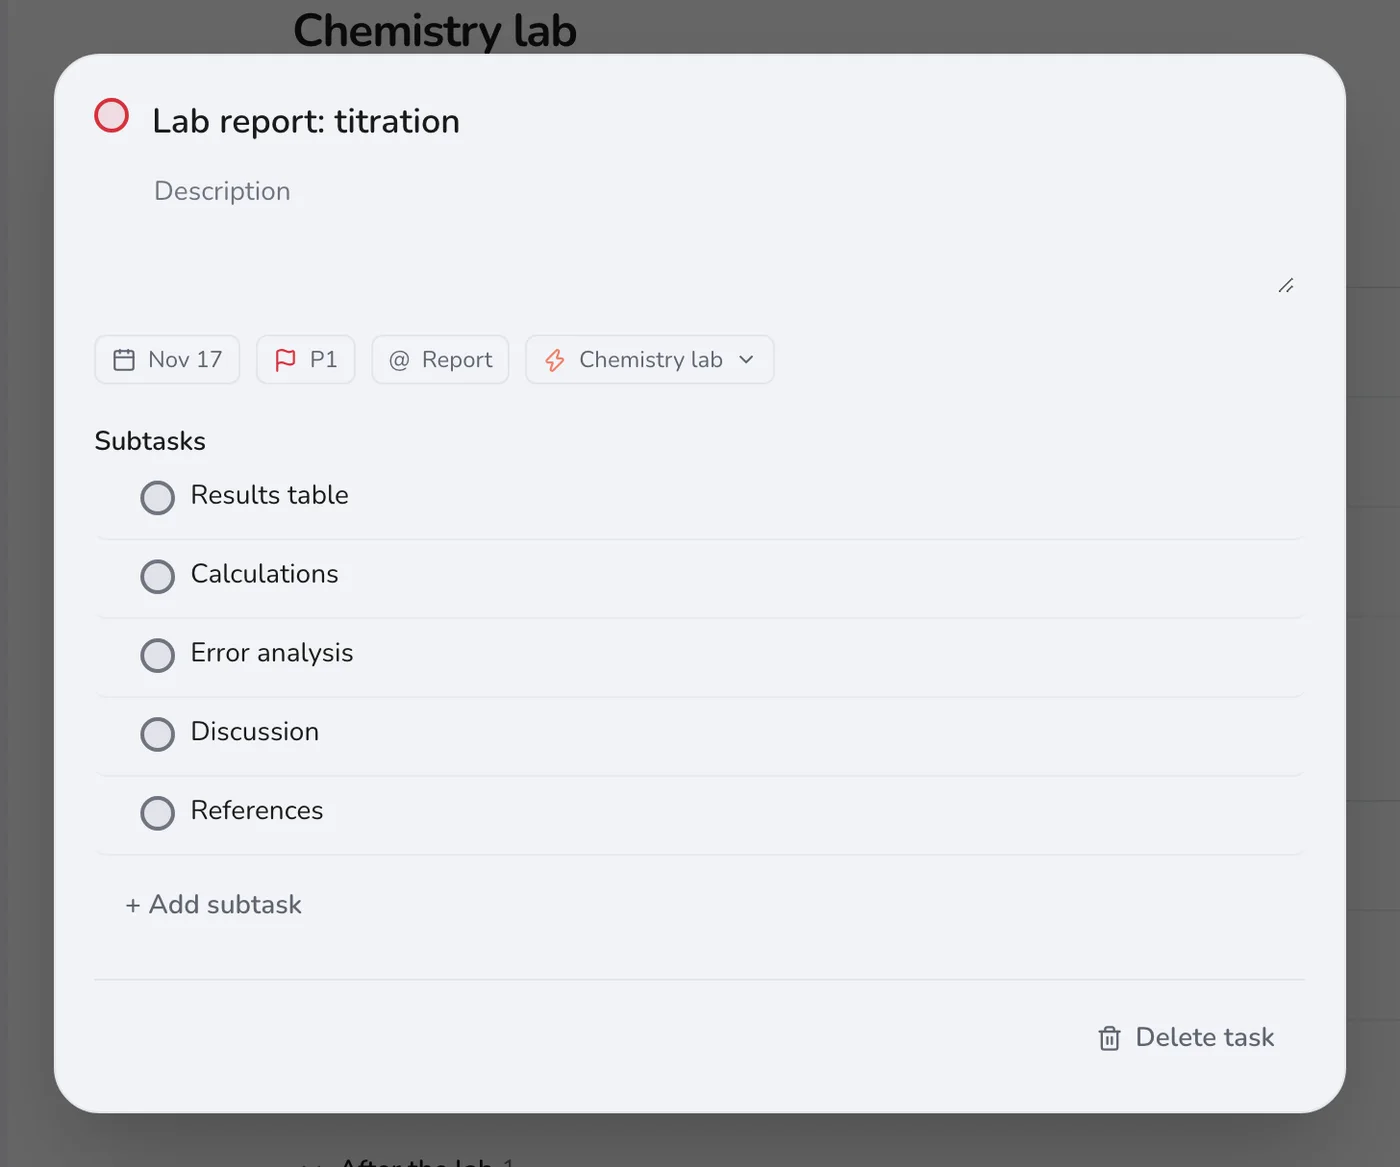
The report is a task with subtasks: results table, calculations, error analysis, discussion and references. Set the due date on the main task, and give a few subtasks their own earlier dates.
Step 5
See all your reports in one list
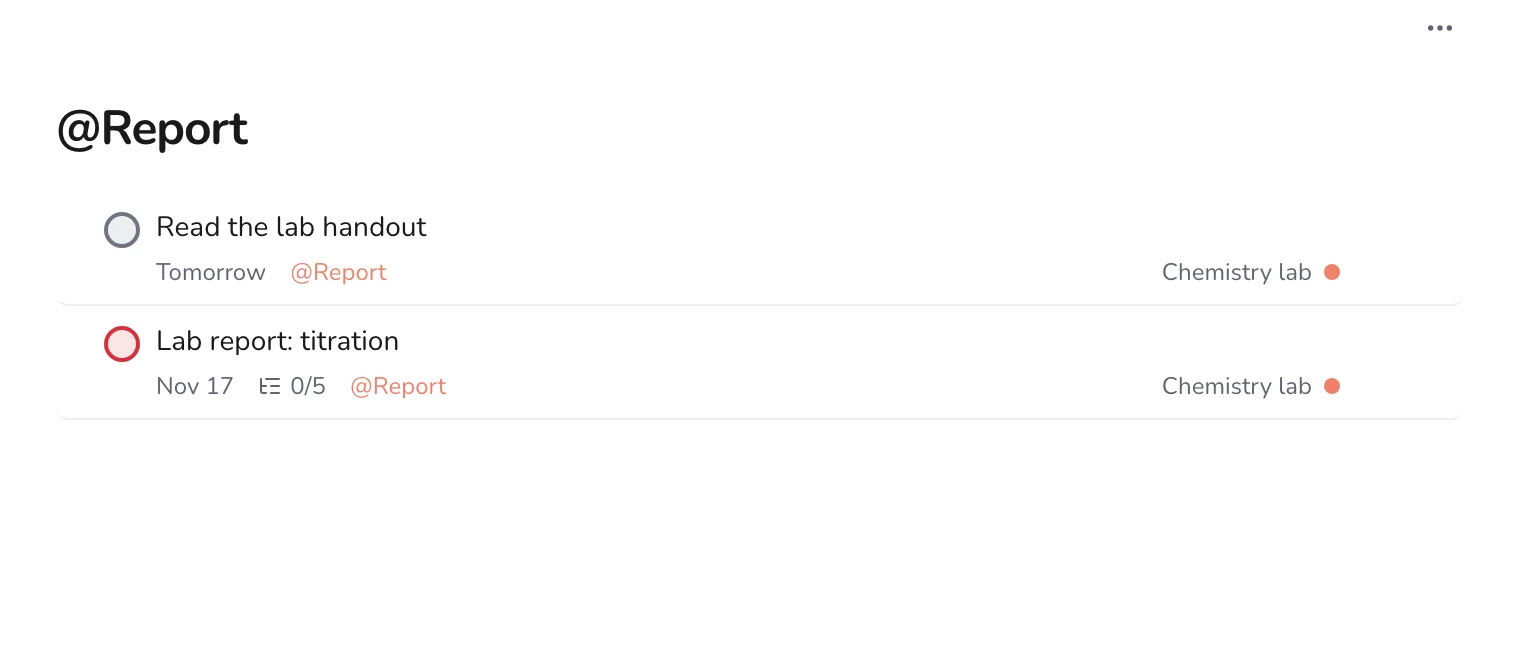
Add the Report label to each report task. Open the label to see how many reports you owe, and when.
Write the report within a day or two of the lab, while it is fresh. If you are juggling several labs and courses, see tracking assignments across every course.